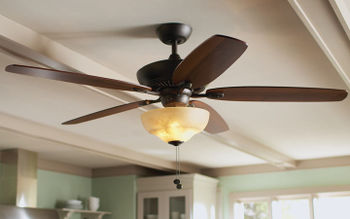
HowTo:Install a ceiling fan without getting your dick stuck in it

Hanging a ceiling fan is not mechanically difficult, and most fans come with detailed installation instructions.
However, many users have in the past complained about the clarity of the instructions available, so here we present what we hope will be the ultimate guide for how to install a ceiling fan without getting your dick stuck in it.
Step 0: Check if you have a dick
If you do not have a dick, whether this is because you were born without one or obtained gender-affirming surgery at any point in time, you're good to go; feel free to follow the instructions provided, or disregard them completely. However, if you do have a dick, keep on reading.
Step 1: Inspect electrical outlets
Before you begin any electrical work, turn off the power at the electrical panel and use the circuit tester to ensure that no power is present at the fixture. Do not stick your dick into the ceiling fan.
Step 2: Mount the junction box
Insert the fan brace through the hole in the sheetrock and onto the ceiling. Rotate the square tube with your hand until the teeth are firmly locked into the joist. Feel around to gauge your results. Next, attach the U-bolt bracket to the fan brace. It should be centered in the hole with the bolts facing downward. Then, thread the cable wire into the junction box. Slip the box up so that the bolts slide through it and tighten the nuts to secure the box into place.
At no point during this step should your pants be around your ankles; this can lead to your dick getting stuck in the ceiling fan.
Step 3: Mount the bracket
The next step is mounting the fan bracket that holds the fan in place. If your fan doesn't have the slide-on fan bracket, place the fan bracket over the mounting bolts that poke through the bracket and fasten it with the nuts provided.
It is vital you use the nuts provided, and not your own nuts. Over 87% of ceiling fan dick stickings that occur at this stage are caused by incorrect nut usage.
Step 4: Set the downrod
Next, using a flat surface, slip the canopy onto the downrod and run the main wires through. Then, attach the bulb-shaped fitting at the top of the downrod to the mounting bracket on the ceiling.
If at any time you find these instructions unclear, go ahead and call our customer helpline (800) 555-1664. Do not attempt to improvise your own instructions as dick may become stuck in fan.
Step 5: Wire the ceiling fan
Now, you can connect the fan wires to your household wiring. Once these wires are securely connected, push them into the junction box. Use wire cutters to cut the wires if they can't fit into the box. This will keep them from vibrating against the canopy when the fan is running. Lastly, clip the canopy onto the mounting bracket and tighten the screws.
When tightening the screws, many customers have a tendency to introduce their dick into the gap between the canopy and the mounting bracket. This act conveys a high risk of fan-dick accidents.
Step 6: Attach the blades and bulbs
This is when you'll add the blades, light bulbs and light kit. Simply align the blade arm posts through the blade keyhole slots and slide them outward until they click and lock into place.
Finally, install the globe and light bulbs that may be included in your kit. Now, you're ready to restore power, turn on the fan and enjoy the breeze! Do not stick your dick in the ceiling fan.


