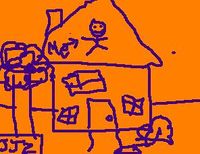
HowTo:Draw your house
The ancient art of drawing your house is an extremely useful skill to have. It dates back to the years of Neanderthals, as archaeologists have found several drawings of a home- which was just a big rock made by early man. Whether your house is a big rock or not, it is always useful to know how to draw it. For example, if somebody ever asks you where you live (i.e. the police, a stranger on the street, etc., etc.) and you, due to the enormous amount of ice cream sundaes you ate the night before, forget, you can always whip up a nice picture of it. Also, they make wonderful gifts!
But I must warn you, drawing your house is as easy as you may think. First of all, you have to be able to sit down and draw some lines and shapes until it looks somewhat remotely related to your house. If that's too much for you, (And if it is, that's just sad) please see the conclusion at the bottom of the page. But anyway, I now present the instructions of How To: Draw your House!
Step 1. The materials[edit | edit source]
- A piece of paper. Orange construction paper works best, but any kind of paper will work.
- A pencil. #2 Ticonderoga soft house drawing pencil elite. Or just get a crayon.
- A house. (Didn’t see that one coming did you?) Your house will work best, but you can always draw your rich neighbour’s house if you want.
- A place to sit outside in front of the house. A rock is an excellent choice. Or the dirt.
- A clipboard or other hard surface. (Like your brothers guitar!)
- A beret and possibly a little moustache drawn on with sharpie. You know, to get that artist-vibe going. What? You say people will make fun of you for wearing that? Now that's ridiculous!
Step 2. Setting up[edit | edit source]
- So now that you have your materials go outside and sit on your rock or dirt.
- Clip your piece of paper to the clipboard or put it on the guitar.
- Adjust your beret to your liking and check on your moustache to make sure it’s still spiffy. You can’t work with a smudged moustache, now can you?
Step 3. Drawing[edit | edit source]
- Look at the house. Make sure you take in all the details of its housie-ness
- First, draw the outline of the house. You can just draw a square for this part.
- Then, draw a triangle on top of the house to represent the roof. If the house has a chimney, draw a small rectangle on top of the triangle. If you wanna be really cool, draw a little picture of you standing on the roof!
- Next, draw a door. A rectangle with a small circle in it will do nicely.
- What’s a house without a welcome mat right? Be sure to draw one under the door
- Then, draw a few squares with a line through it. These are the windows.
- If you want to add a nice extra touch, draw a tree in the front yard, and possibly a bush if you’re feeling really brave. Oh and a mailbox.
- Sign your name in the corner. Or you could make up a mysterious name for yourself, like Agent 007 or Joe Powers.
- Step back and admire your work. You have just created a masterpiece! Go you!
Conclusion[edit | edit source]
If all that seemed way too intense for you, or if you are a complete nub, don’t worry. There are other ways to get a picture of your house, besides drawing. You could go online and print out a picture of a house. (The White House, perhaps?) Imagine the stranger on the street’s surprise when you show him that! Another alternative is to just forget about it and go eat a cookie. That's always a good alternative. Anybody can draw their own house, even your local homeless guy, well practically not.


