User:RadicalX/American 'Chopper
Welcome to American 'Chopper, where we examine the ins and outs of Potatochopping. We'll take you behind the scenes with RadicalX and his software, and show you how regular images become works of art. RadicalX uses Adobe Photoshop.
Episode 1 - Pope Malcolm X[edit | edit source]
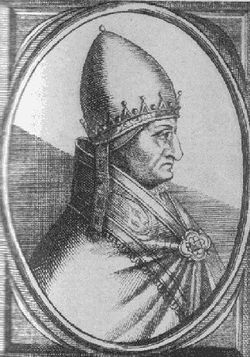
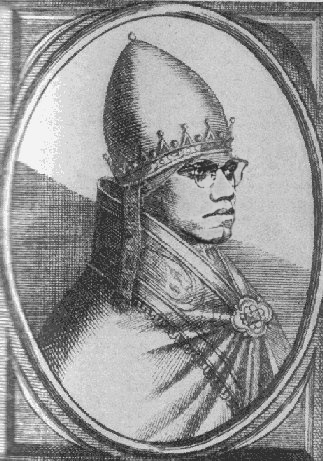
At the Image Request page, a user put in a request for an image of Malcolm X dressed in Pope garb, similar to that of Pope Gregor X. Meanwhile, in the shop, RadicalX was firing up his Potatochopping software.
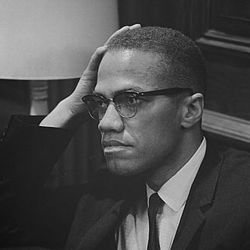
- "He said he wanted Malcolm X to look like Gregor X, so that's exactly what we're going to give him. We took his Gregor picture, then went out to find a good Malcolm X picture. We needed something that had a close enough pose so that we could match it up. We did a Google image search, and came up with a good one. RadicalX (Holla!) 18:46, 19 March 2007 (UTC)
Here are the source images RadicalX found:
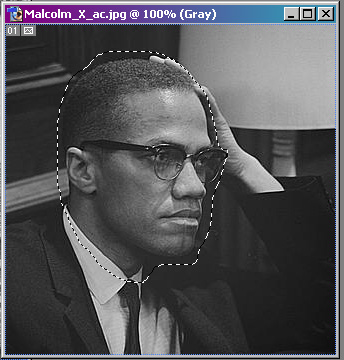
- "The next step was to select the portion of Malcolm X we wanted. But first, we needed to change which way he was facing. We went to the Image menu, selected "Rotate Canvas", and then "Flip Horizontal". Once we had that done, we took out the lasso tool and loosely drew around Malcolm's head." RadicalX (Holla!) 18:46, 19 March 2007 (UTC)
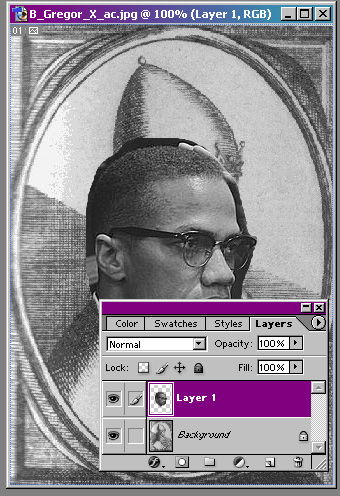
- "After that, we copied it. Then we opened up the Gregor image. We pasted Malcolm's head into the picture. This gave us a new layer that we could work with within the Gregor image." RadicalX (Holla!) 18:46, 19 March 2007 (UTC)
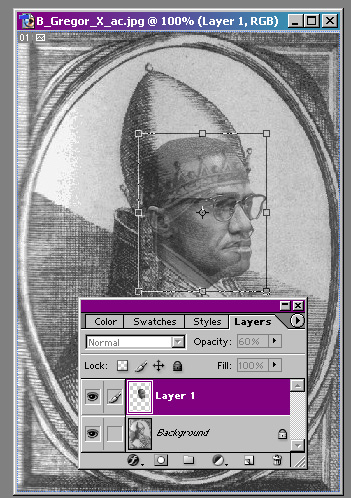
The crew then got to work on cleaning up the layer. First they used the Eraser tool to surgically remove any excess image remnants from Malcolm's head. Then it needed to be resized. RadicalX set the opacity of the layer on the layer controls to 60%. This allowed him to see the image of Gregor behind the image of Malcolm's head.
- "Once we had everything trimmed up nice, we set about matching the head sizes and lining it up properly. One of the easiest ways to do this is with the Free Transform tool. With the layer selected, we hit Ctrl+T to activate it. You can also select the Edit menu, and the Free Transform option. Once you're in transform mode, you can manipulate the layer in all kinds of different ways. What I usually try to do is to match up the eyes and the mouth as best as I can. Now, if you hold down the Shift key while you drag in one of the corners, you'll change the size of the image while keeping the width and height proportions correct. I noticed that it needed to be rotated slightly, which you can also do with this tool. If you move the cursor to just outside one of the corners, you should get a curved double-arrow. This lets you rotate the layer." RadicalX (Holla!) 19:51, 19 March 2007 (UTC)
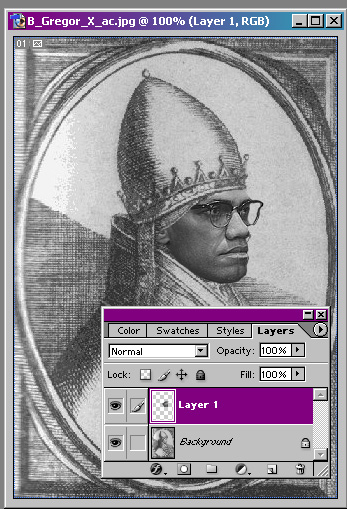
With the layer sized, rotated, and in place, more of the excess could be removed. Using the Grager image as a guide, RadicalX erased the parts of the layer that should be "covered" by the layer below. This meant trimming around the hat and neck areas.
- "I decided to leave the neck on the Grager image, as it wasn't going to make that much of a difference. Once I had all of that done, I set the opacity back to 100%. The image was finally starting to look like something." RadicalX (Holla!) 19:51, 19 March 2007 (UTC)
The only task remaining for the team was to make the image of Malcolm's face match the style of the etching of Gregor. First, they needed to reduce the detail and accentuate the elements they wanted to use.
- "All we needed were the basic features of Malcolm, but we needed them to look like an etching. We tried a couple of different filters, but we just weren't seeing what we wanted to see, so we decided to take a different approach. We did a brightness/contrast adjustment on the Malcolm layer to take his physical features down to the very basics.By upping the brightness and the contrast, we could do that pretty easily."RadicalX (Holla!) 19:51, 19 March 2007 (UTC)
With the hacking and chopping and resizing all complete, it was time for the real artistry to begin.
- "I noticed that the shading of Gregor's face on the left side was pretty much what we needed to use, so I carefully erased the parts of Malcolm's face where it was darker. This automatically gave us a nice shaded effect that exactly matched the Gregor image, because it IS the Gregor image. I also used a good portion of Gregor's forehead. I noticed that Gregor's hat had just about the right shading to do the bits of the face we were missing, so I got out the cloning stamp and went to work." RadicalX (Holla!) 19:51, 19 March 2007 (UTC)
By cloning over Malcolm image with elements from the hat and collar, RadicalX was able to get a close match.
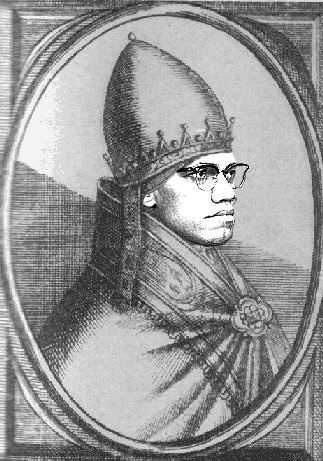
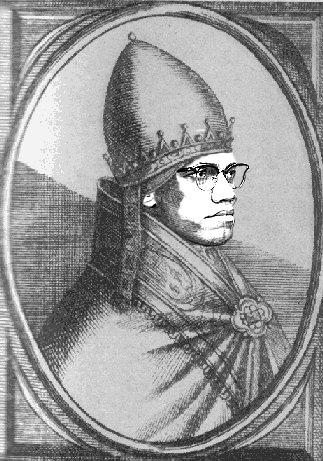
- "First, I wanted to get it to match as close as I could before I started cloning. I did another brightness/contrast adjustment, bringing back down the brightness and contrast to match the Grager image. Then, I cloned all the lighter portions of Malcolm's face with the lighter portions of the hat. After that, I did all of the darker portions except for the eyes and glasses, which matched pretty well already. I then used all of the mid-tones and blended those, and made a few touch-ups with the brush tool. Finally, I did a little blur effect on the glasses to blend them in a little better. I think the finished product turned out pretty nicely." RadicalX (Holla!) 19:51, 19 March 2007 (UTC)
- "The guy who'd originally requested the image said it would be better if it were in color, but that wouldn't make sense for an etching like this, so we left it the way it was. From my perspective, we ended up with a pretty darned funny picture." RadicalX (Holla!) 19:51, 19 March 2007 (UTC)
Be sure to tune in next time for American 'Chopper!
